How to add a number to the WhatsApp Cloud API
Creating an application
- Access https://developers.facebook.com/ and log in to your Facebook account.
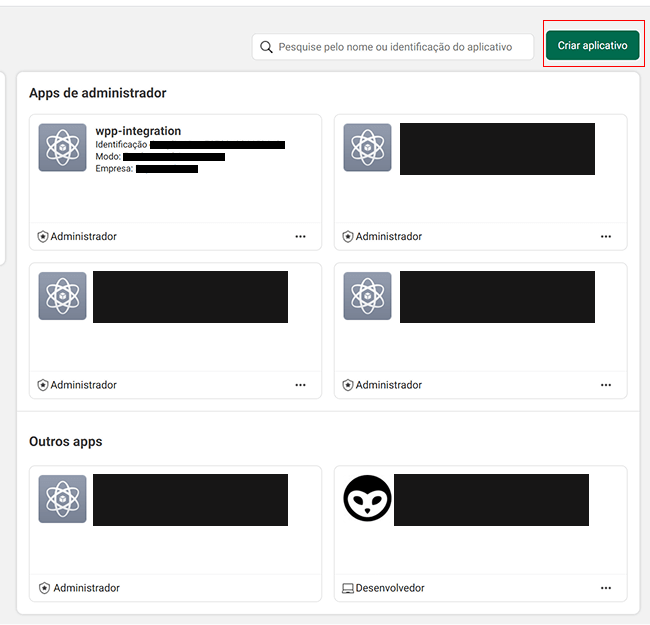
- Go to “My Apps” and click “Create App”.
- Choose the application type “Business”.
- Enter the display name and select a validated Business Account (Business Manager).
After clicking Create app, the user will be directed to the application details configuration step.
On this screen, the basic information that identifies the app within the Meta platform must be provided.
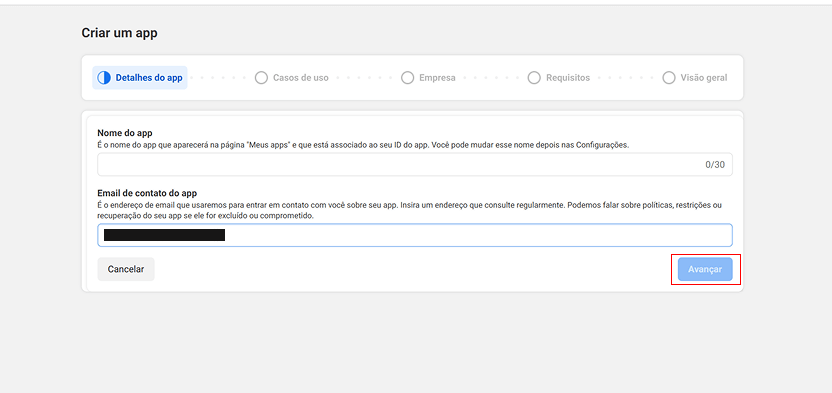
Required fields
-
App name
Identification name of the application that will be displayed in the My Apps section of Meta Developers and associated with the app ID.
This name can be changed later in the settings. -
App contact email
Email address used by Meta for communications related to the application, such as:- Policy updates
- Restriction or blocking notices
- App recovery in case of compromise
Use a valid and regularly monitored email address, as it will be Meta’s main contact channel.
Next step
After filling in the required fields, click Next to continue creating the application.
Use case selection
After providing the application details, the user will be directed to the Use Cases step.
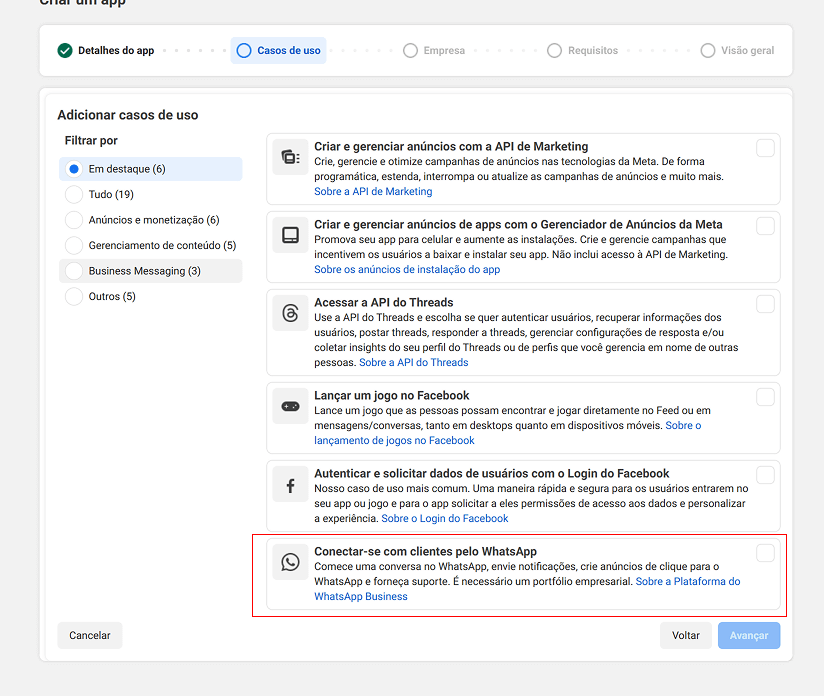
- In the list of use cases, locate Connect with customers via WhatsApp.
- Select the WhatsApp use case as highlighted in the image.
- Click Next to proceed with app creation.
Selecting the Connect with customers via WhatsApp use case is mandatory to enable integration with the WhatsApp Business API.
Business portfolio selection
After selecting the WhatsApp use case, the user will be directed to the step to choose the business portfolio that will be connected to the application.
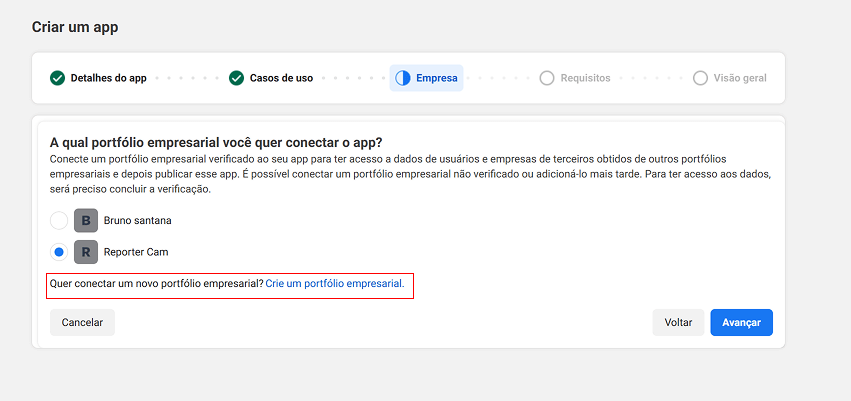
- Select the business portfolio to which the application will be linked.
- If the user does not yet have a business portfolio, click Create a business portfolio, as highlighted in the image.
- Follow the business portfolio creation process on the Meta platform.
- After selecting or creating the portfolio, click Next to continue.
To integrate the application with WhatsApp Business, it must be linked to a Meta business portfolio.
:::Saiba mais
For more information on how to create a business portfolio, visit:
https://www.facebook.com/business/help/1710077379203657
:::
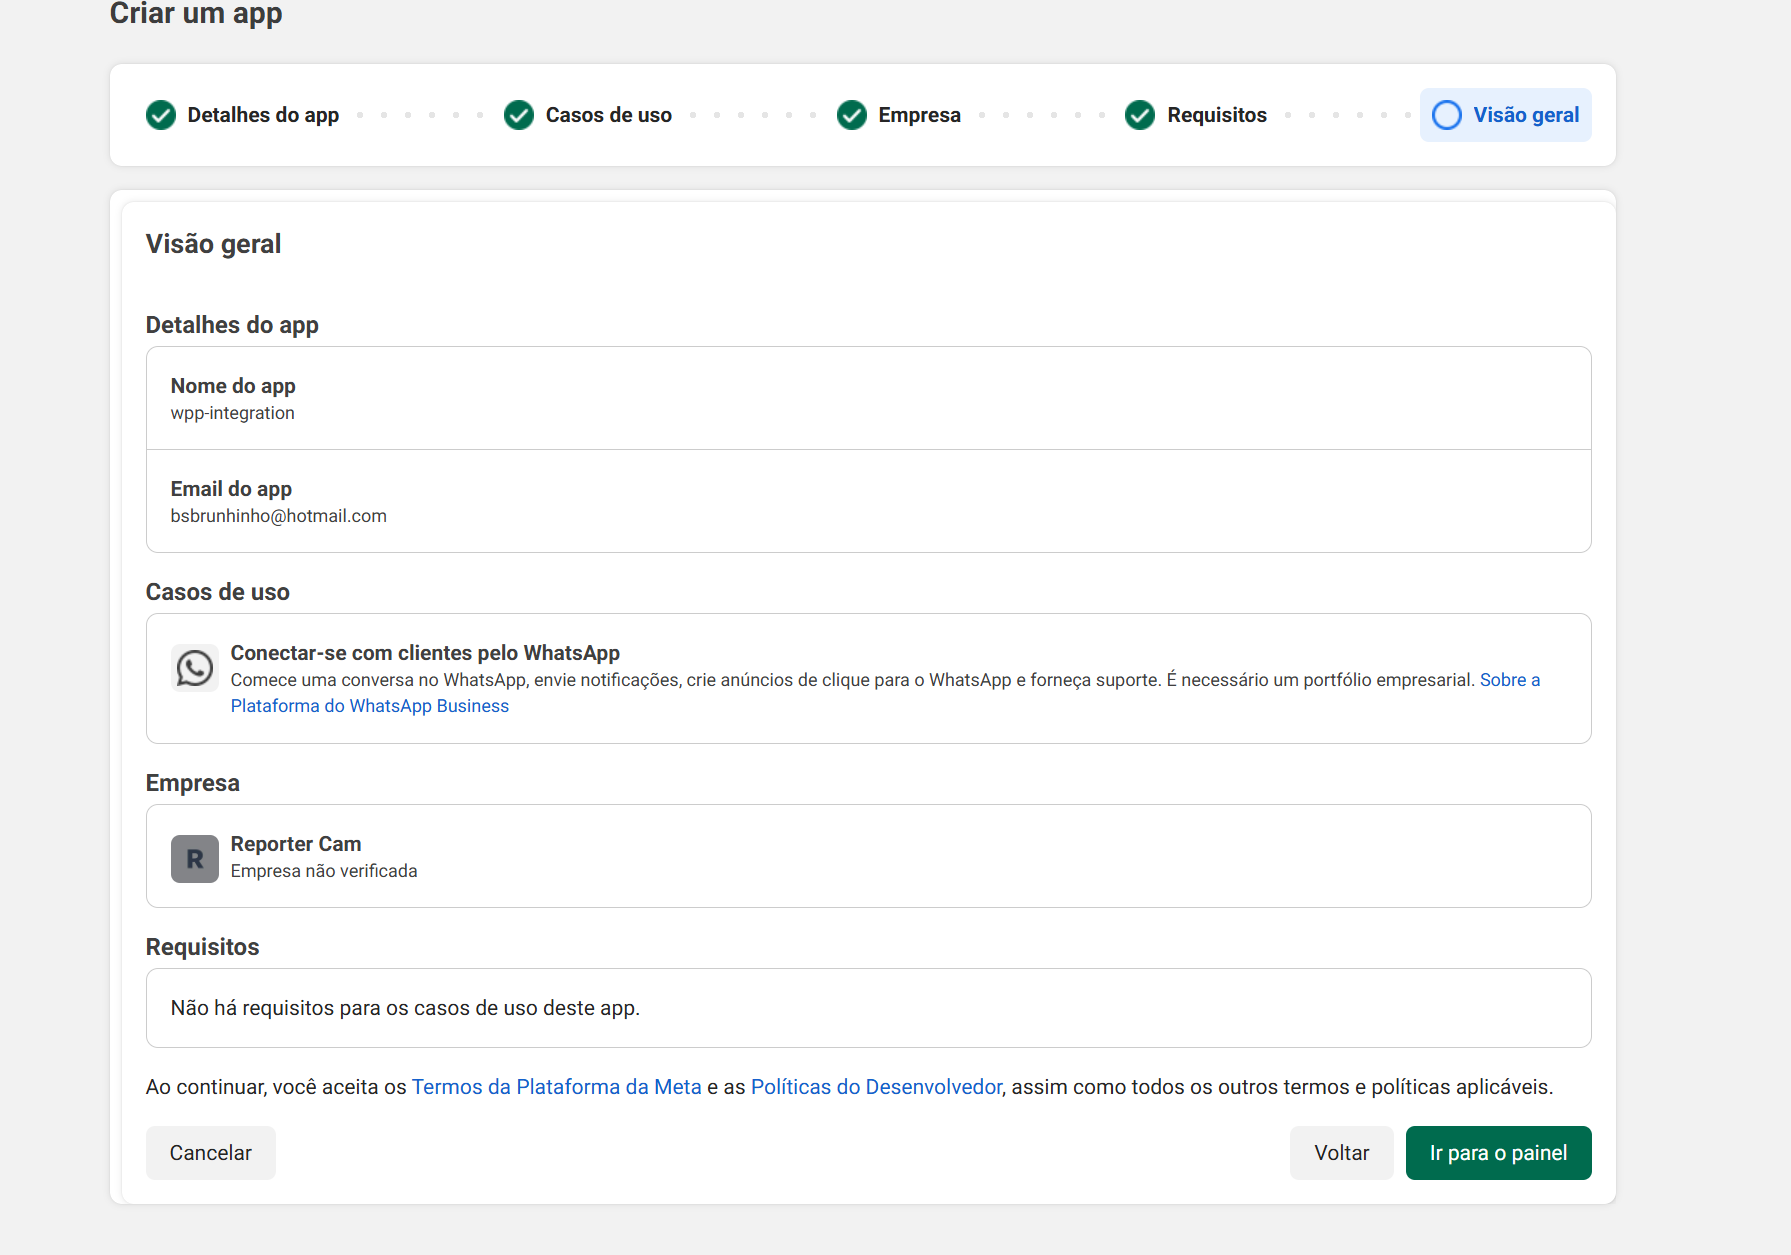
After completing all steps, the final screen will display a summary of the application settings.
Click Go to dashboard to finish the process.
Application dashboard
After completing the initial application creation steps, the user will be redirected to the app Dashboard.
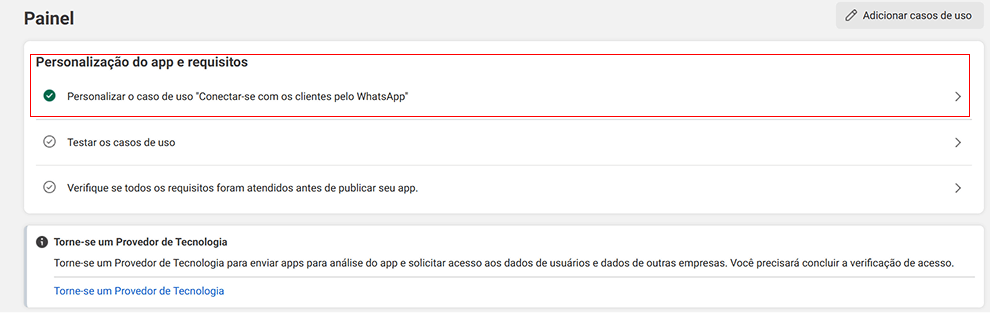
- On the app dashboard, locate the App customization and requirements section.
- Click Customize the use case "Connect with customers via WhatsApp", as highlighted in the image.
- In this section, you can configure the WhatsApp Business integrations.
This is where the main WhatsApp Business integration settings are configured.
Initial WhatsApp Business configuration
At this stage, the required data for sending and receiving messages using the WhatsApp Business API will be configured.

- In the Access token section, click Generate access token.
- Copy the generated token and store it in a safe place, as it will be used in later integration steps.
- In Send and receive messages, add the phone number that will be used to send and receive WhatsApp campaign and support messages.

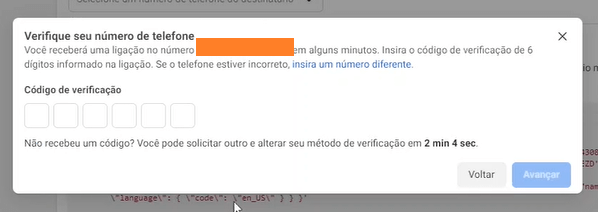
Add your phone number, remembering that it cannot be registered with WhatsApp.
Visit WhatsApp support to learn how to delete an existing account.
-
After adding the number, two important identifiers will be displayed:
- Phone number ID
Unique identifier of the phone number registered in WhatsApp Business. - WhatsApp Business Account ID
Identifier of the WhatsApp Business account associated with the app.
These two IDs will be used later during the integration configuration in SOUV.
- Phone number ID
-
Finally, click Configure webhooks to start configuring message and event reception.
Save the access token, phone number ID, and WhatsApp Business Account ID, as they are required to complete the integration in SOUV.
Webhook URL configuration
Important: Complete all previous steps for app creation and phone number addition before reaching this stage.
Go to WhatsApp > Configuration in your Meta app dashboard.
You will see the Webhook configuration screen with the following main fields:
- Callback URL: Paste the webhook URL generated in SOUV (you will copy it in the next step).
- Verify token: Paste exactly the verification token generated in SOUV.
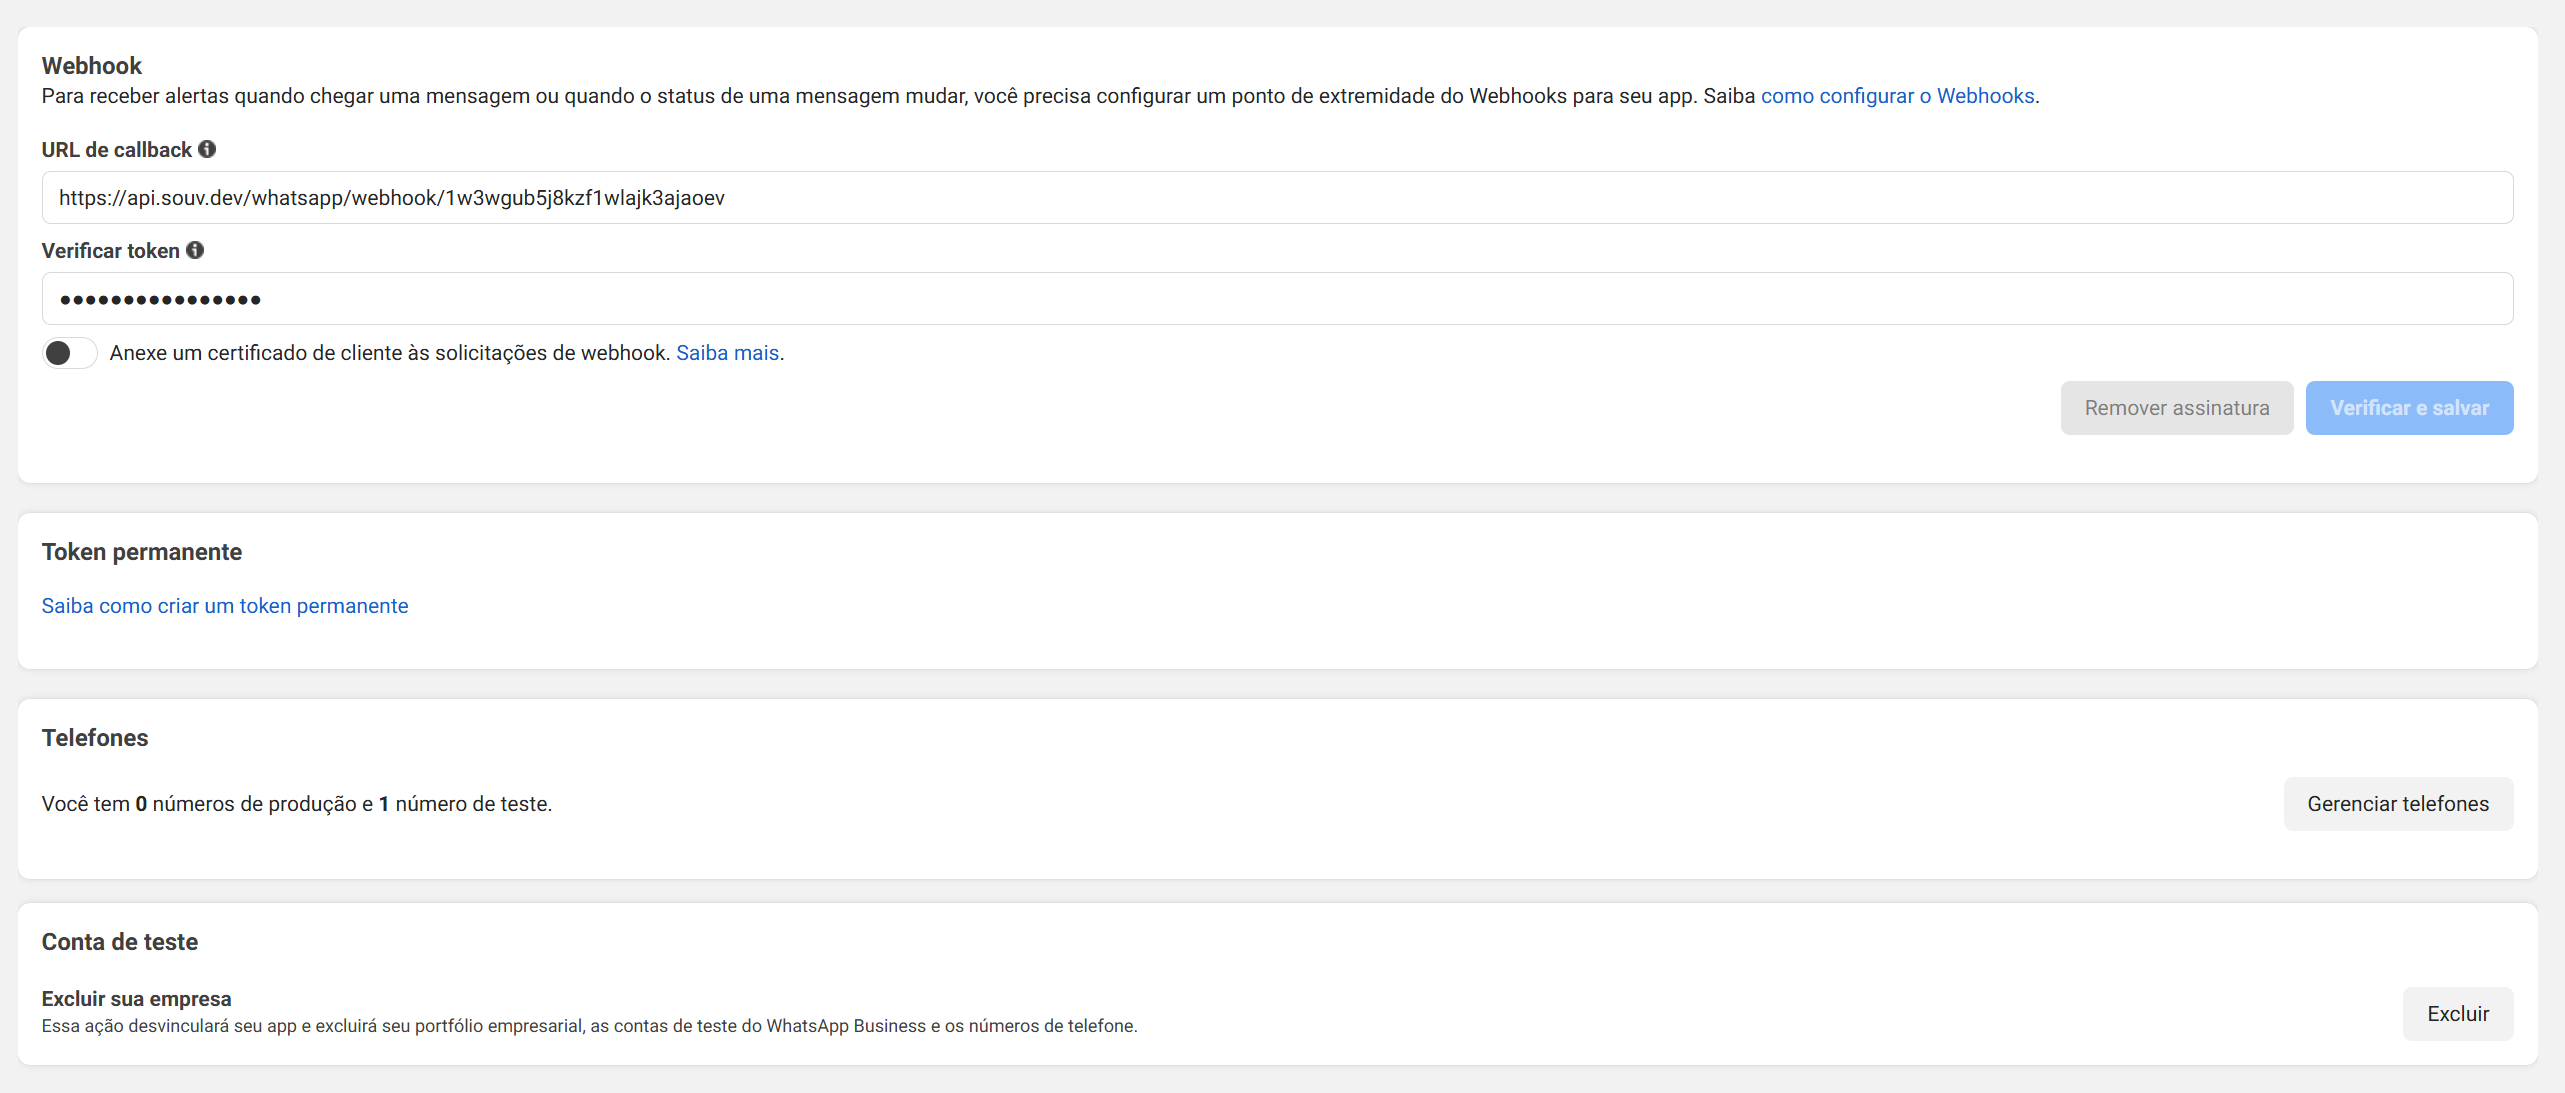
(Click Verify and save only after pasting the SOUV URL and token).
Now let’s go to SOUV to generate this URL and token.
Configuring the integration in SOUV
[conteúdo continua exatamente como o original…]